Using Mutagen Compose to speed up Docker web applications on Mac
Mutagen has recently come out with a new tool called Mutagen Compose. Mutagen Compose combines Mutagen and Docker compose files to synchronise files and networks from your Mac to your Docker container.
Performance of Docker for Mac is notoriously bad for apps that work with many files, like modern web applications that have many Node dependencies. Or PHP/Laravel apps that have many Composer dependencies.
Earlier this year, in May, the edge version of Docker saw a release (rather an experiment) of a Mutagen integration which allowed developers to cache directories that were defined in the volumes section of their docker-compose file. Due to mixed results they have decided to pull it from the Edge release again.
Mutagen Compose to the rescue
In May I wrote a blog about using Mutagen with Docker. This was before Mutagen Compose existed. To get Mutagen working you had to create a sync manually and start/stop it manually based on the container state. This has all been streamlined in Mutagen Compose and it works very seamless.
Let's look how we can upgrade our app to use Mutagen compose and enjoy all the performance benefits.
First, we will need to install the beta version of Mutagen:
brew install mutagen-io/mutagen/mutagen-compose
Next, let's analyse a basic docker-compose.yml file for a Laravel app:
version: '3'
services:
  app:
    container_name: app
    build: docker/app
    networks:
      - appnet
    working_dir: /var/www
    ports:
      - 80:80
    volumes:
        - ./:/var/www
  db:
    container_name: db
    image: mysql:5.7
    volumes:
     - data:/var/lib/mysql
    ports:
      - 3306:3306
    networks:
      - appnet
networks:
  appnet:
    driver: bridge
volumes:
  data:
    driver: 'local'
To add Compose support we can make use of the x-mutagen extension fields available since docker-compose version 3.7.
Change the docker compose version to 3.7:
version: '3.7'
Add the x-mutagen extension. I will explain the important bits later.
x-mutagen:
  sync:
    defaults:
      mode: 'two-way-resolved'
      ignore:
        vcs: true
        paths:
          - 'vendor'
          - 'node_modules'
          - '.idea'
          - 'storage/debugbar'
          - 'storage/framework/views/*'
          - 'storage/framework/sessions/*'
          - 'storage/framework/cache/*'
          - 'storage/framework/debugbar/*'
          - 'storage/clockwork/*'
    code:
      alpha: '.'
      beta: 'volume://code'
      permissions:
        defaultDirectoryMode: 755
        defaultFileMode: 644
      configurationBeta:
        permissions:
          defaultOwner: 'id:33'
          defaultGroup: 'id:33'
Add a volume code:
volumes:
  data:
    driver: 'local'
  code:
Replace the volume mount to the Mutagen volume:
volumes:
    - code:/var/www
For a basic setup, this is all you need! To run it, you will need to use the mutagen-compose command instead of the docker-compose command.
Let's start the app:
mutagen-compose up -d
You should see output that looks like this:
Creating network "app_appnet" with driver "bridge"
Creating network "app_default" with the default driver
Creating volume "app_data" with local driver
Creating volume "app_code" with default driver
Creating app_mutagen_1 ... done
Resuming existing forwarding sessions
Resuming existing synchronization sessions
Creating synchronization session "code"
Performing initial synchronization
Creating db  ... done
Creating app ... done
Head over to your application. It might not work yet, and that's expected. You might see the following error:
Warning: require(/var/www/public/../vendor/autoload.php): failed to open stream
This is expected because our Mutagen config states we don't sync vendor and node_modules directories. Why not? Because trying to sync that many files results in performance issues again and if you enable those directories from syncing, the entire app sync will grind to a halt and any updates you make to your code will take up to a few seconds to sync. To keep the sync snappy and fast it's recommended to only sync the application code and exclude stuff that does't get updated often.
To get the application working you will need to run composer install and npm install in the container manually.
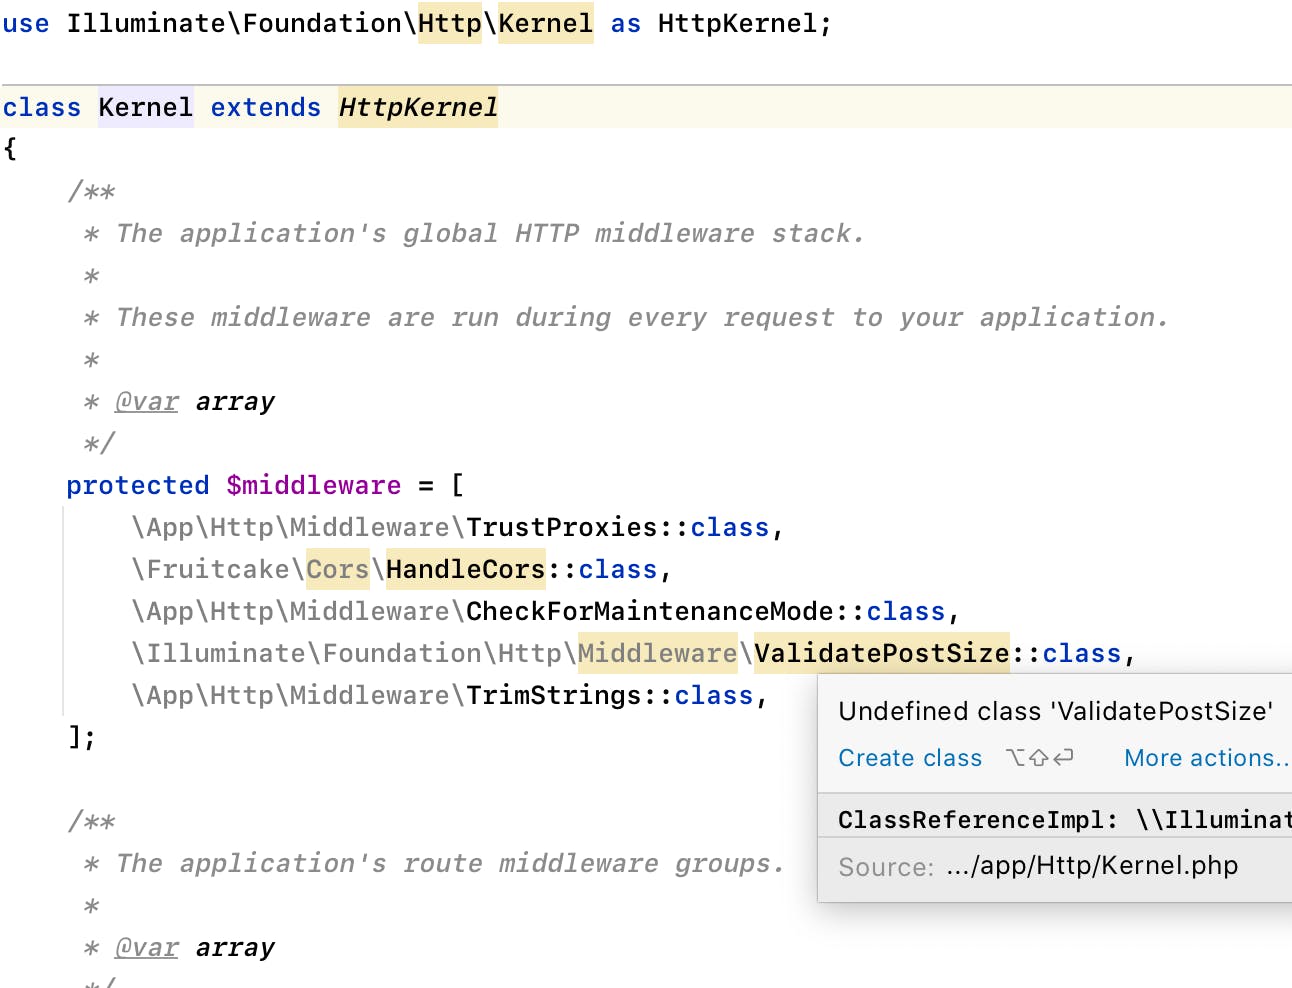
However, this leaves us with a problem. We now have dependencies existing in the container but not on the host. This is troublesome for those working with an IDE. Not having those directories means no autocomplete in the IDE:

To work around this we can copy those directories manually from the container to the host like this:
docker cp <container>:<container path> - | tar -x --directory <host path>
Example:
docker cp app:/var/www/vendor - | tar -x --directory /local/path/to/my/app
To automate this, I have created a Makefile that does this automatically after running mutagen-compose down:
up:
    mutagen-compose up -d
down:
    mutagen-compose down
    docker cp app:/var/www/vendor - | tar -x --directory /local/path/to/my/app
Now you can start and stop the app with make up and make down respectively.
Important: Make sure the Makefile is indented with tabs and not spaces. It won't work with spaces.
Explaining the configuration options
Let's start with the ignore section.
ignore:
  vcs: true
  paths:
    - 'vendor'
    - 'node_modules'
    - '.idea'
These are the paths that we don't want to sync to and from the container. Mostly because they contain many files and they slow everything down. vcs: true makes it so version control directories like .git don't get synced.
Examine this list carefully and add as many directories in there that don't need to be synced, like compiled frontend assets! The more ignores the faster the sync will work.
code:
  alpha: '.'
  beta: 'volume://code'
Alpha (in this case) refers to your local machine and beta refers (also in this case) to the Docker volume. You can read more about why it's called like that on the Mutagen website.
configurationBeta:
  permissions:
    defaultOwner: 'id:33'
    defaultGroup: 'id:33'
This ensures the files in the container have the correct owner so you don't run into access troubles like your application unable to read/write into a storage folder. id:33 you should change to the user id of the user that runs the web application in your container. In my case, using NGINX, it is www-data. To get the user ID (and group ID), type the following command in the container:
$ id www-data
uid=33(www-data) gid=33(www-data) groups=33(www-data)
Closing notes
Mutagen Compose is a good option to speed up Docker for Mac. The workflow isn't perfect and requires a few workarounds but if the speed improvements are an important aspect to you, it will really be worth it.
